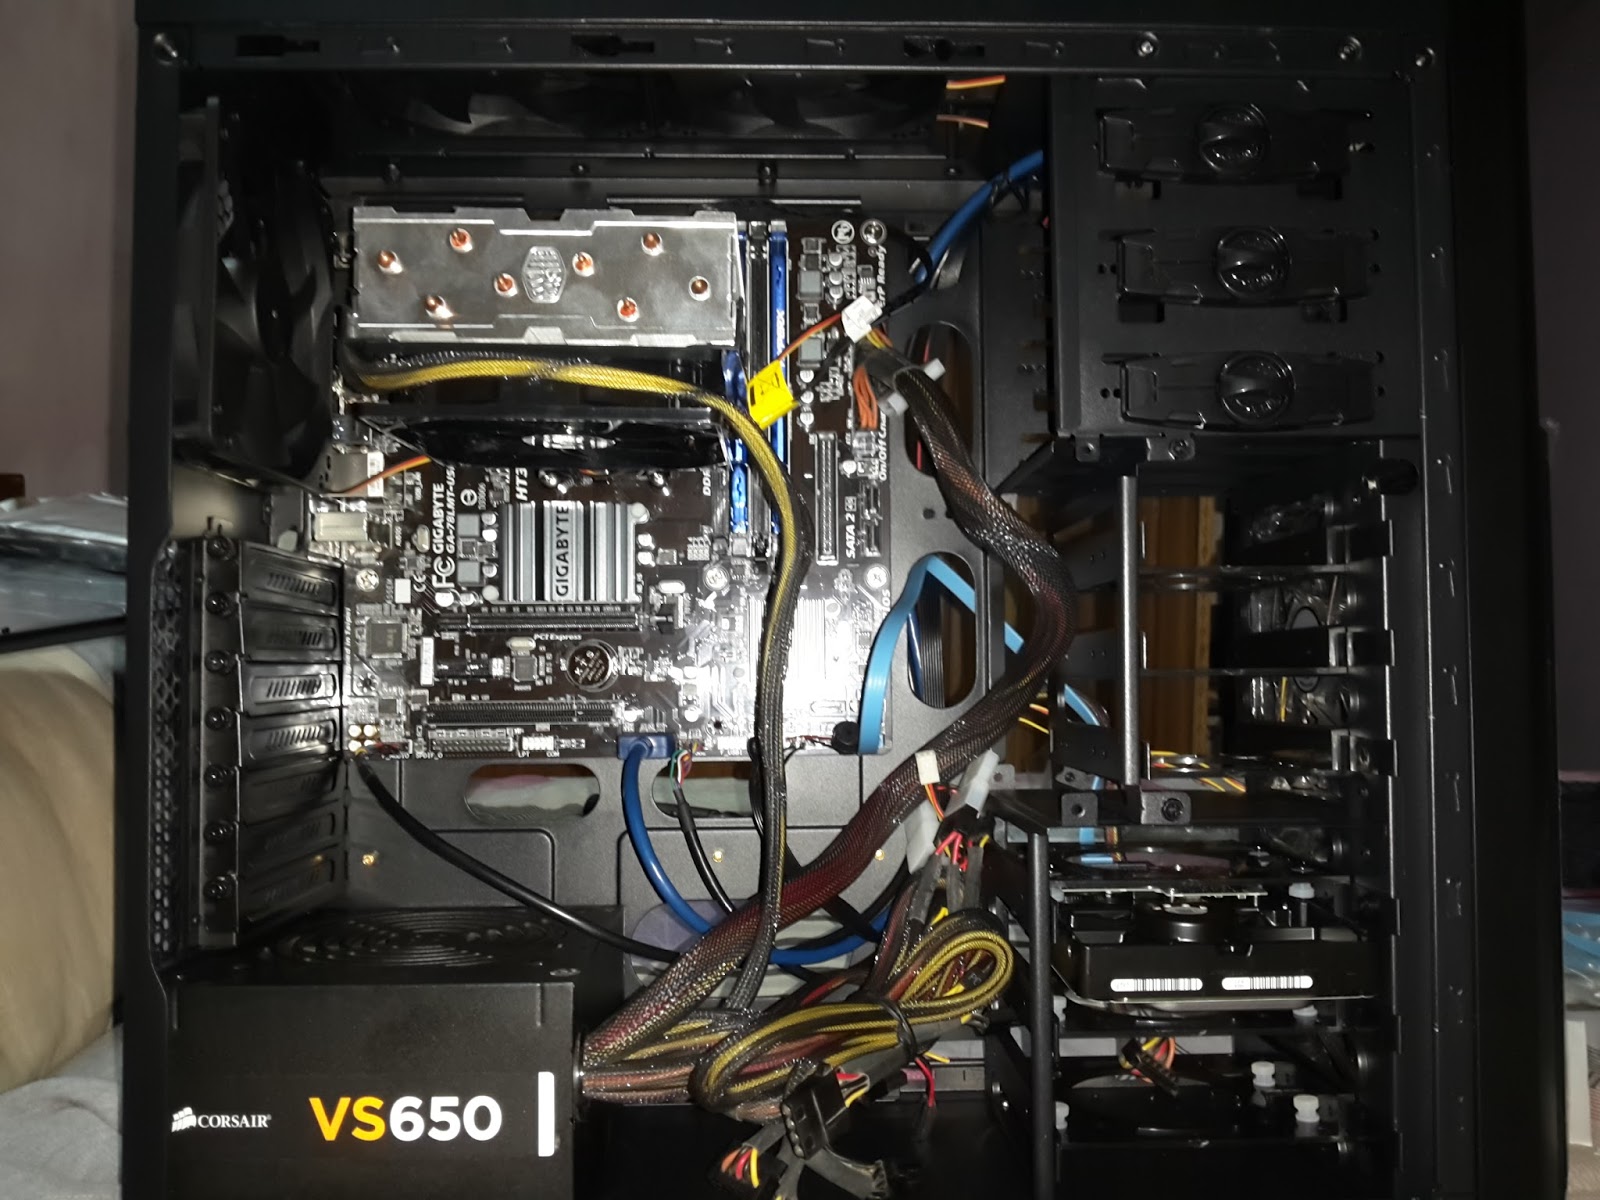
So about 4 months back, I decided I was tired of working on a laptop and wanted a PC instead. I was looking for something to assemble at close to 35000 INR for just a CPU. An initial market survey of the Intel processors blew that estimate out of the water. The quad-core i7 processors were in the 20K range and that was close to 4/5ths of my budget. Despondent, I thought I would give up until George mentioned that the AMD line might not be bad. Amazon had a whole listing of AMD CPU's and soon I was looking at the AMD FX 8350 PileDriver which was an Octa-Core CPU running at 4.00 GHz, when not overclocked. In the recommender list I found a Gigabyte board that would support this CPU but it seemed a little pricey. Searching for the same model name got me another motherboard of the same model number but less colourful, but less expensive. Since I wasn't going flashy RGB lights bling bling on my PC, I decided I could do with a plainer motherboard.

Next was shopping for the power-supply. I already had a Corsair VS 650 that I had ordered eons ago for the Class AB 160W x 4 RMS amplifier and it seemed to be doing well so I looked around for another but I could not find it at the same price, about 3800 INR. That could mean only one thing, music would have to wait because there was a PC that needed building.
Next was the RAM. I was looking at the Corsair fancy heatsinked ones but then the cheapskate in me headed over to Kingston to see what they had to offer. There was Kingston Fury 8GB and it was just , added 2 to the shopping cart and I was off to look at the hard drives.


Over the years I have had hard drives fail on me and I have even been unlucky to have owned a Hitachi Deathstar um. DeskStar. A hard drive that failed with a flash of fire on an onboard IC and took away all of my recently backed up data with it. So I was just looking at the companies on the basis of the portable HDD's which I have, a WD and a Toshiba Canvio. I had been unfortunately stupid enough to buy a Seagate FreeAgent 2TB portable version 1, which has a case that is not ventilated and causes the hard drive to beep distress signals because the power was too low or the temperature was too high. So it was just WD and Toshiba in the end, and for the price, the Toshiba 1TB was hard to beat and I had it in my cart in a second.


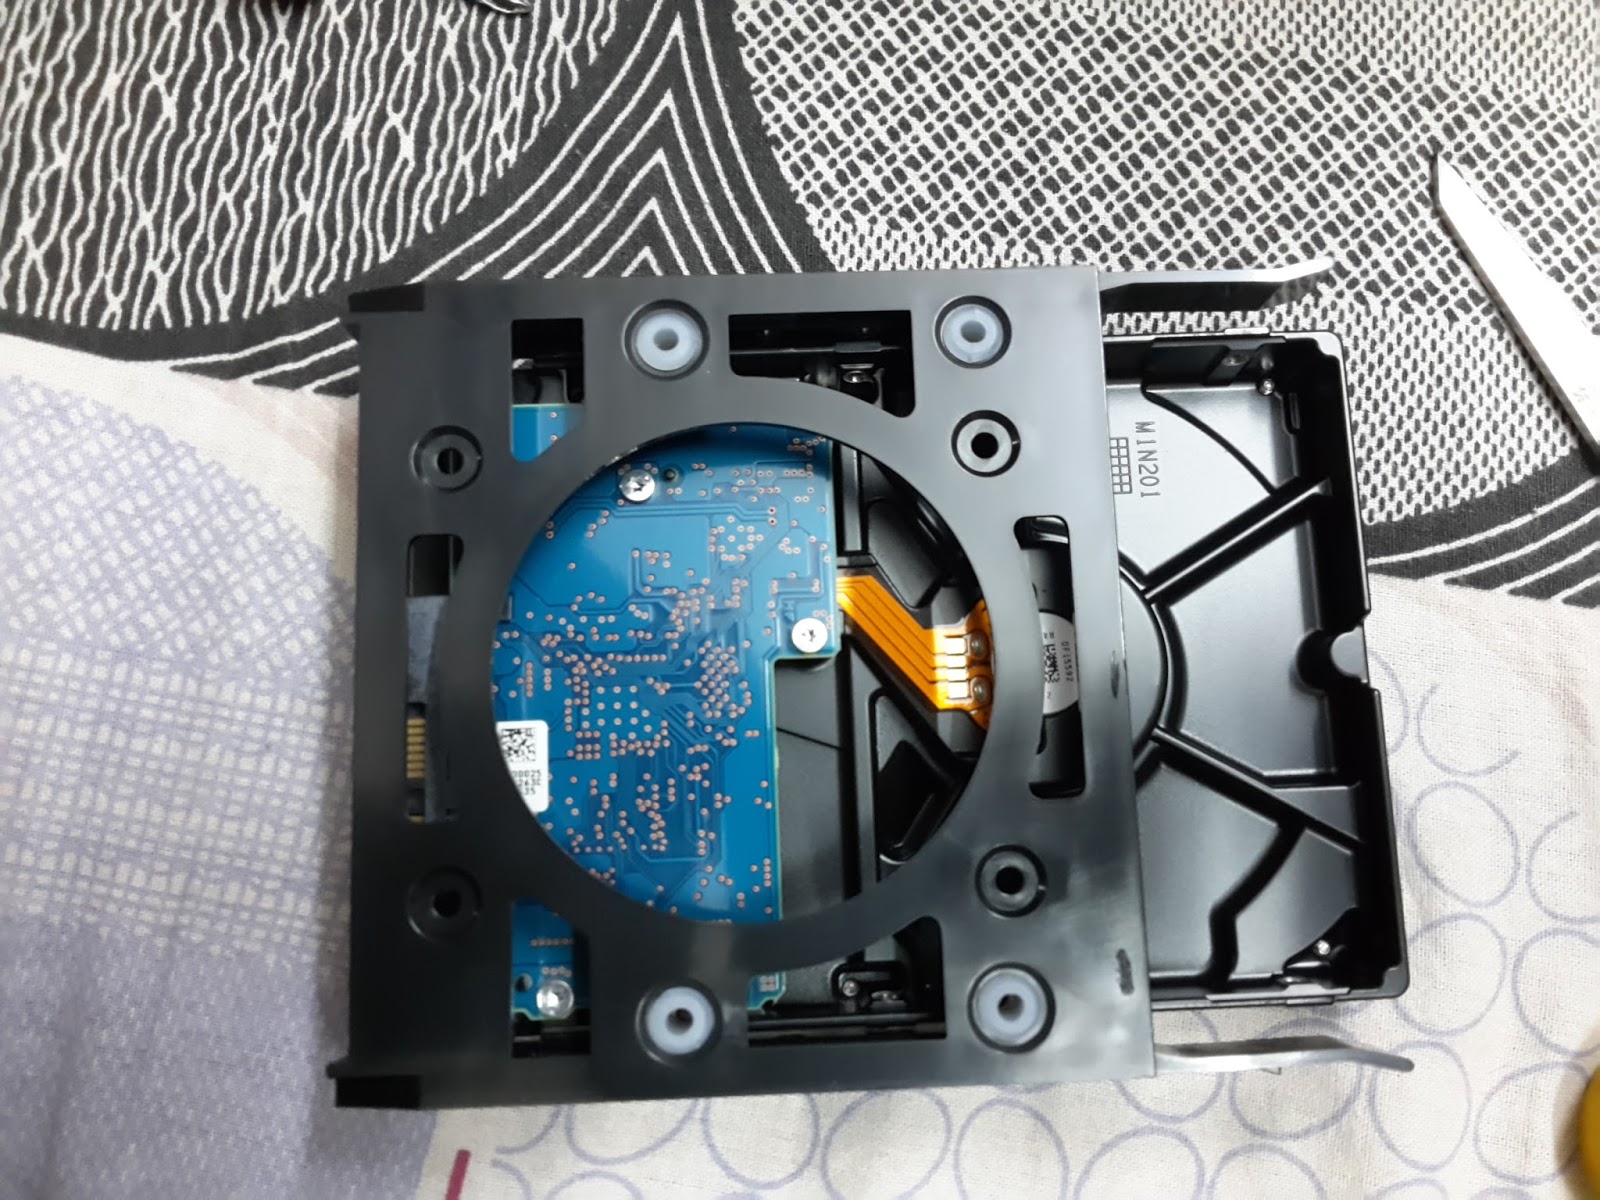
After assembling my CPU I wondered if I could just put my FreeAgent to good use since it seemed to beeping ever so often and threatening to fail all the freaking time. I cracked the case open (it was held by plastic clips) and saw that the drive was sitting in a tray covered in foil. Hello, Seagate, please keep the packaging department out of the enclosure design team. I removed it and found a standard size hard drive that looked as if it could be powered straight off the SATA and the PSU, voila, it worked! So 3TB instead of 1TB and now my movie and television series collection is readily accessible. Even better, the hard-drive is one of those which automatically powers down if it not being used to conserve power. After installation into the CPU, there was a never a beep of protest. It seems the anaemic power supply and heating was a real problem.
Next up was the chassis, this was probably the easiest and hardest choices to make at the same time. Hard because there are awful lot of terrible looking CPU cases that have really tacky plastic work on them that seems inspired by the Transformer robots but do not translate into slick and convenient in real life. I had almost given up on finding a good looking case that did not look like it came out of a movie with clanging robots until I stumbled upon the DeepCool Kendomen. It won the price and the looks department hands down. There were four internal fans, two on the top (which had 3 step speed control switch on the top panel) and two on the front panel. There was some LED lighting in those fans and I was not really sure if it would end up looking tacky but thankfully it didn't.


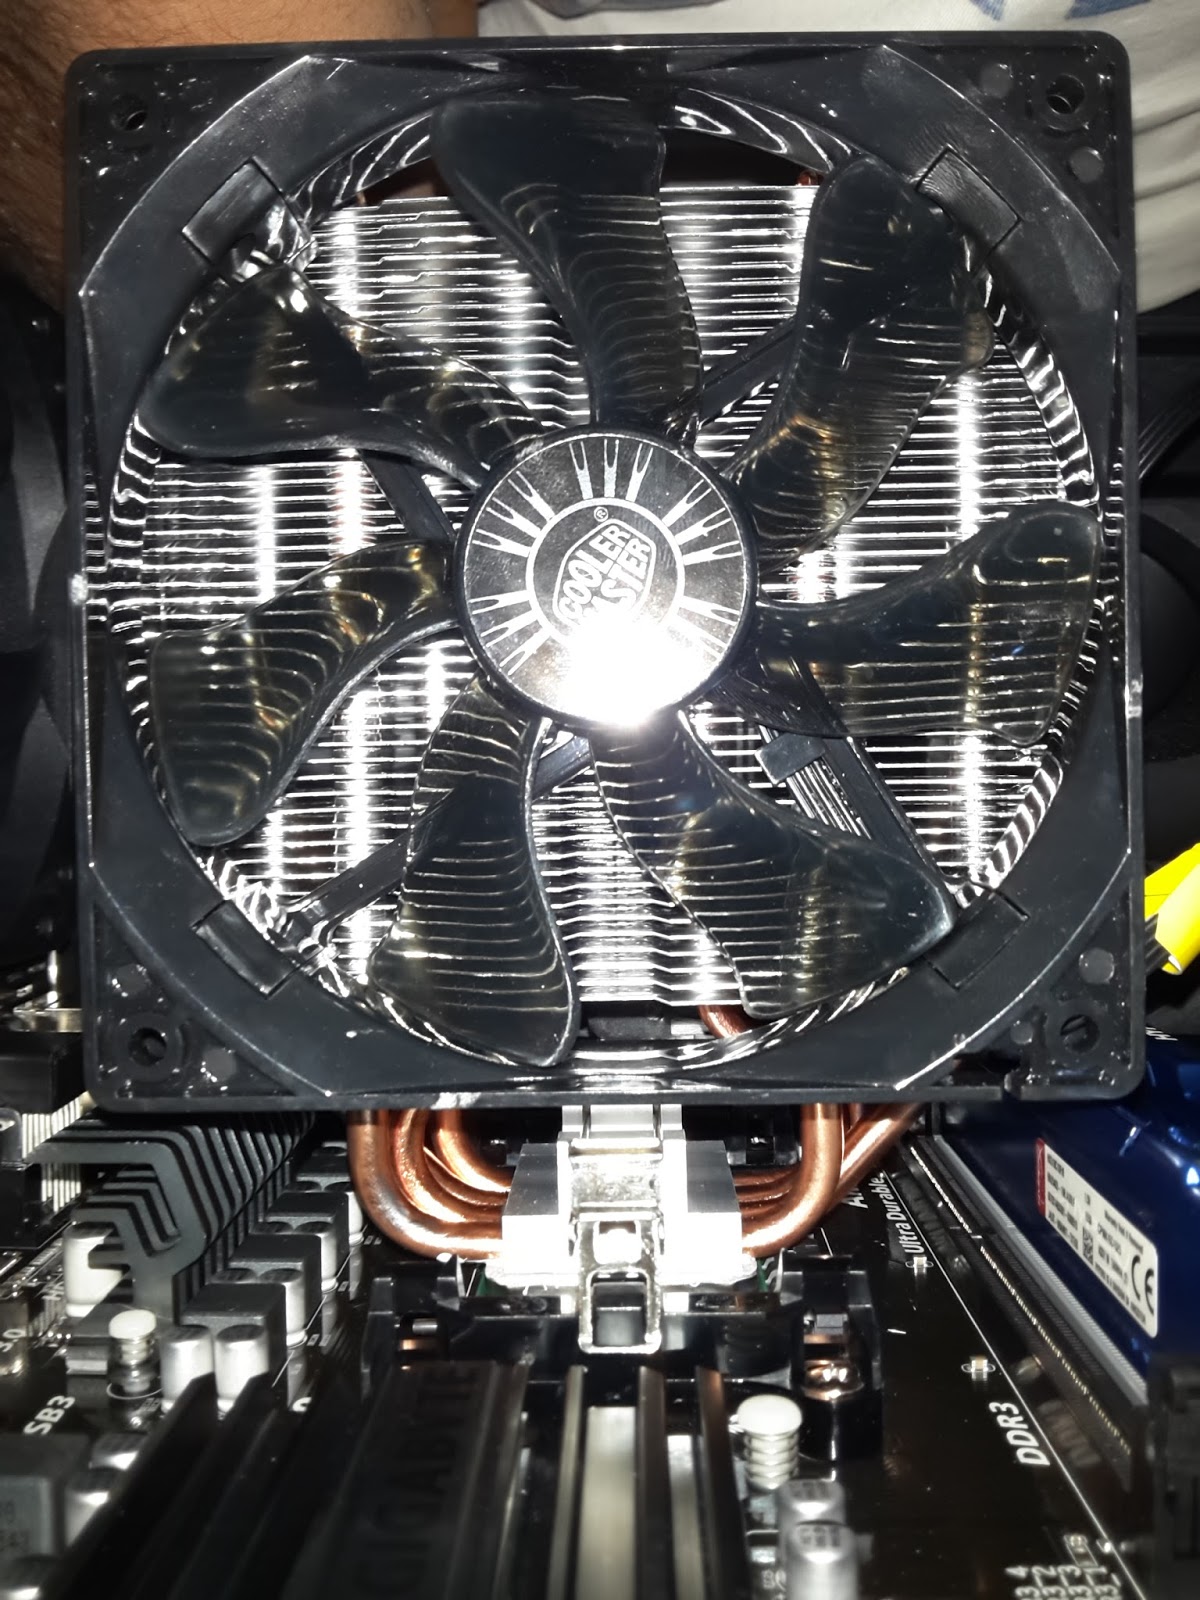
In case the AMD stock cooler was flimsy, I had a Cooler Master T4 that I had bought eons ago thinking that I would experiment with some Peltier cooling. To be honest, the AMD cooler is pretty solid, but I had already read that it would not be sufficient if I wanted to overclock, so I decided to go ahead with the T4.


For the graphics card it was really, really confusing considering that NVidia has many third party manufacturers and they all are very competitively priced whilst Nvidia maintains their own prices. So I kept the purchase of the GFX card for later and about a couple of weeks after the CPU was built I bought an Nvidia Galax which had a great feature to price ratio.

Assembly steps:
First up, sorting out the CPU chassis


Screws, wires and cable ties that come within the chassis


Screwing in the PSU
Attaching the hard-drive involves choosing a mounting tray from the CPU and screwing the hard drive to the tray and fitting it back into the CPU. The tray is held in with a clip-lock mechanism that has to be squeezed lightly to extract the tray from the rack. The screws are provided with the CPU manual package and go through the rubber mounting washer to shock-mount the hard-drive.


Thereafter, slide in the rack to click-lock it into the hard drive tray.
Next is putting in the plate that sits between the CPU chassis and the ports on the motherboard. This step has to be done before you secure the motherboard on the chassis otherwise it will be difficult to get it to snap into position. Also, if you have an anti-static strap, it would be nice to wear it a couple of minutes before you actually start to handle the motherboard.


Taking out the motherboard from the anti-static packing, while wearing my anti-static bracelet


Putting the motherboard on the anti-static packaging while I prepare to attach the RAM and the processor.
Locate the two DIMM sockets and pull apart the clips, align the RAM PCB with the grooves taking care to observe that the longer and shorter parts of the pin traces align with the slots in the socket. Push into the slot and if you are doing it right, the clips will start rising on their own and snap into place into grooves on the side of the RAM PCB.


After figuring out the right way in which the processor goes into the motherboard, we need to clip it in place and the way to do that is to pull at the lever gently, you will feel the processor sliding into place. Keep pushing the lever and then bend it under the clasp that is supposed to keep it in place.


 After fitting the port panel plate into place, place the motherboard into the chassis and secure with the four screws that are give that have a outer spiral groove patter under their screw heads because these will maintain a nice contact with the grounding plane of the motherboard.
Now for attaching the heatsink, meet the T4 from Cooler Master, take out the instruction flyer and sort out the hardware for attaching the heatsink, it has different kinds of attachments depending on the processor architecture. I am using the clip assembly that is used in AM3+. I found out which clips and components to use by looking at the pictures that were present in the flyer.


Time to apply heatsink paste on the processor, nice tiny silver pouch of heatsink paste as it comes with the T4. Cut open and apply messily to the processor, spread it to a very very thin layer such that it only fills the valleys caused by the imperfection of the mating surfaces of the processor and the heatsink pipe and base. Be careful while handling the heatsink and don't press or bend any sides otherwise you may end up deforming the fins of the heatsink.


Clipping the heatsink into place is quite hard and requires a bit of wedging in fat-fingers-into-tiny-spaces sort of work. But a little patience and you can get it fixed in a minute or two of wiggling around and pressing. The clip is quite hard and tight so it won't be that


After attaching the heatsink it is time to finish the rest of the things, cables for the front panel, hard drives and CPU fans. The DeepCool has two fans on the top and two LED lit fans on the front. The top fans have speed control.


 Boot Up time!
Shucks, Windows 7 for now
Setup time, yawn


Shiny lights on the front fans, also stickers from the RAM and the processor have to be displayed on the chassis. I chose that location cause it is a lot more visible than any other place on the CPU.
